
 |
Site Map |  |
Feedback |  |
 |


 |
 |
 |
Button |  |
Noise |  |
Wait |  |
Wall |  |
 |

|
Procedural Textures |

|
||||||||||||
|---|---|---|---|---|---|---|---|---|---|---|---|---|---|---|
|
 |
|||||||||||||


|
|
|||||||||||||
On this page: |
||||||||||||||
Textures are generally created by artists and use image filters to make the texture tile without visible seams. Procedural Textures allow the artist to describe how to make a texture which is inherently tilable with no smeared edges and can be redesigned and tweaked at any stage. Sometimes the rendering is real-time, for example: during a game that didn't have room to store the textures as bitmaps but has time to run the procedures. Sometimes they are simply an artists tool allowing tweaks and undos to happen anywhere in the texture's generation procedure. Like C++ keywords, using Procedural Texture primitives is a black art: simple building blocks with a lot of scope.
The beginning is to fill a box with a greyscale gradient from black to white:
for(WORD x=GetWidth(); x--; ) { // Loops are best comparing the counter with zero, so this counts down. double t=double(x)/GetWidth(); // Calculate the parameter (ratio in the range [0,1]) indicating how far through the loop is. BYTE B=BYTE(Round(255*t)); // Turn the parameter into a Greyscale Level. for(DWORD y=GetHeight(); y--;) SetPixel(x,y, RGB(B,B,B)); }GetWidth(), GetHeight() and SetPixel are members of CPixelBlock which was used as a base class.
Round is declared in Global.h and should be used instead of casting from floating point to integer in tight loops because the standard casts clear the processor pipeline which stops caching working and slows things down a lot.The key thing to notice is that the Width is mapped to a double in the range [0,1] and then mapped to a Greyscale Level in the range [0,255] by simple multiplication. There are some obvious things that can extend this idea:
- the parameter, t, could be altered using filters:
- something more interesting than GreyScale Level could be manipulated, perhaps Hue from gColor:
- the y loop could also have a parameter:
- some element of randomness could be used to make things look more natural: the bricks in this wall are not all perfectly ligned up:
Playing with Parameters
The following code shows how much can be done simply with filtering parameters for x and y.
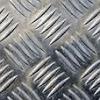
The target is to produce a floor texture like this photograph:
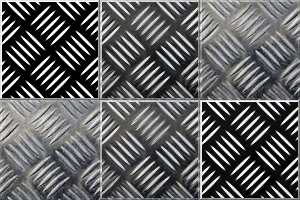
 double BumpWidth=0.66; for(WORD x=GetWidth(); x--;) { double u=double(x)/GetWidth(); double uRepeat2m=gFilters::Repeat(u,2,true); double uRepeat8m=gFilters::Repeat(u,8,true); double uBumpLength=gFilters::CircleCurve(uRepeat2m); double uBumpWidth=gFilters::Gain(uRepeat8m, BumpWidth); bool uStep2=gFilters::Square(u,1); for(WORD y=GetHeight(); y--;) { double v=double(y)/GetHeight(); double vRepeat2m=gFilters::Repeat(v,2,true); double vRepeat8m=gFilters::Repeat(v,8,true); double vBumpLength=gFilters::CircleCurve(vRepeat2m); double vBumpWidth=gFilters::Gain(vRepeat8m, BumpWidth); double uvBump=gColor::Multiply(uBumpLength,1, vBumpWidth, 0); double vuBump=gColor::Multiply(vBumpLength,1, uBumpWidth, 0); bool vStep2=gFilters::Square(v,1); double Chess=(uStep2==vStep2 ? uvBump : vuBump); double Threshold=gFilters::Ramp(Chess, 0.55, 0.75); BYTE B=BYTE(Round(255*Threshold)); SetPixel(x,y, RGB(B,B,B)); } }The code has been laid out so that the parameters can be rendered at any stage to see the effect each filter is having. Simply change the 'Threshold' in the line setting the BYTE B, to the parameter stage you want to see. Here are some examples images showing the main stages:
You can see how the first two images are mixed to create the third. There are two versions of these first three images being created in the code; the other version is rotated a quarter of a turn. The two versions are then mixed like chess-board squares to create the fourth image. Finally, a simple Ramp Filter is used to pick an area of this blurry mix and turn it into what could be a height-map for the tile.Given a simple tool like the Ramp Filter, is it obvious that it would allow you to cut out a nicely antialiased cuved shape from a blurry approximation? Once you have seen the principle used, the tools available become far more interesting. The black art is just beginning. BumpWidth is done using Gain curve that steepens for wider slots: the white half is becoming more intense as the gradient increases.
Did you notice the deliberate mistake?
The original photograph has five bumps in each set, but the code produces a pattern with only four bumps! This is the beauty of Procedural Textures: simply change all occurances of '8' in the code to '10' and the correct pattern is made:
Rotation By Shearing (RBS)
It is also possible to rotate the texture using shearing which is a re-sampling of the image using an offset in each axial direction. This brings us to a texture that is potentially a height-map for the original photo as shown in the morphing image. The RBS code is alarmingly simple, but does require a separate pass of the image and a destination image (in which this code is run):
  for(WORD x=GetWidth(); x--;) {
    for(WORD y=GetHeight(); y--;) {
      WORD sx=Round(            (x+y)*xScale) % SourceImage.GetWidth();
      WORD sy=Round((GetHeight()+x-y)*yScale) % SourceImage.GetHeight();
      SetPixel(x,y, SourceImage.GetPixel(sx,sy));
 } }
The image was created with xScale=yScale=1;Like most of the algorithms this one is entertaining: it simply takes the source pixel from increasingly offset locations and yet can produce tileable, rotated and zoomed results.
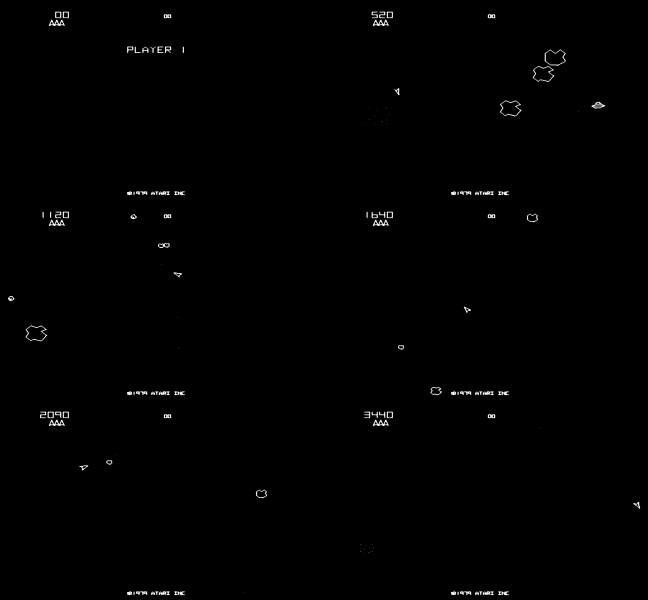
The modulus operator (%) is used to keep the samples within the image; to wrap around the source image as if the image were wrapped on a torus like the old Asteroids game where asteroids cross from one edge to the far side as if all the edges are joined:

The asteroids (and space ships) are moving around as if on the surface of a torus. This is easy to imagine if you start with a torus like a bicycle tyre inner-tube and cut through it to make a long cylinder; then cut along the cylinder and you end up with a rectangular-ish sheet. The flat version is the screen, the uncut torus is how the space-ship pilots see their world.
Finishing the Texture
The photograph needs colouring with a base metal colour followed by a spattering of dirt generated using Noise.
For more, check out the Button tutorial and Brick Wall texture:

