void Wall(const double& BrickWidth, const double& BrickHeight, const double& MortarThickness) {
double BMWidth =BrickWidth +MortarThickness;
double BMHeight=BrickHeight+MortarThickness;
double BorderWidth =MortarThickness/BMWidth;
double BorderHeight=MortarThickness/BMHeight;
for(WORD y=GetHeight(); y--;) {
double v=y/BMHeight;
int Row=Floor(v);
v-=Row;
for(WORD x=GetWidth(); x--;) {
double u=x/BMWidth;
u=Frac(u);
double w=gFilters::HermiteStep(u, 0, BorderWidth )
-gFilters::HermiteStep(u, 1-BorderWidth , 1);
double h=gFilters::HermiteStep(v, 0, BorderHeight)
-gFilters::HermiteStep(v, 1-BorderHeight, 1);
BYTE B=BYTE(Round(255*w*h));
SetPixel(x,y, RGB(B,B,B));
} }
GreyScale=255;
}
GetWidth(), GetHeight() and SetPixel are members of CPixelBlock which was used as a base class.
Round is declared in Global.h and should be used instead of casting from floating point to integer in tight loops because the standard casts clear the processor pipeline which stops caching working and slows things down a lot.
HermiteStep is defined in gFilters.h and smooths the change from black to white:
The effect of the two Hermite Steps that make w is this:

The edge of each brick fades from black to white very quickly, or it would if there was space... All that is actually drawn is a grey line. Later the bricks will be shifted and the use of the HermiteStep will be more obvious.
The effect of the two Hermite Steps that make h is this:
When the two are multiplied together, this is the result:
because black is 0 and white is 1, the black areas in either image remain black (0*x==0)
Now alternate rows need to be shifted, which can be done by adding half a parameter to u before the Frac is taken for odd Rows:
void Wall(const double& BrickWidth, const double& BrickHeight, const double& MortarThickness) {
double BMWidth =BrickWidth +MortarThickness;
double BMHeight=BrickHeight+MortarThickness;
double BorderWidth =MortarThickness/BMWidth;
double BorderHeight=MortarThickness/BMHeight;
for(WORD y=GetHeight(); y--;) {
double v=y/BMHeight;
int Row=Floor(v);
v-=Row;
double Shift=(Row & 1 ? 0.5 : 0);
for(WORD x=GetWidth(); x--;) {
double u=x/BMWidth;
u=Frac(u+Shift);
double w=gFilters::HermiteStep(u, 0, BorderWidth )
-gFilters::HermiteStep(u, 1-BorderWidth , 1);
double h=gFilters::HermiteStep(v, 0, BorderHeight)
-gFilters::HermiteStep(v, 1-BorderHeight, 1);
BYTE B=BYTE(Round(255*w*h));
SetPixel(x,y, RGB(B,B,B));
} }
GreyScale=255;
}
This gives a greyscale image which is recognisable as a wall:
but it's far too regular and computerised to be real.
The bricks can be shifted randomly a little using a Coherent Noise Function:
void Wall(const double& BrickWidth, const double& BrickHeight, const double& MortarThickness) {
double BMWidth =BrickWidth +MortarThickness;
double BMHeight=BrickHeight+MortarThickness;
double BorderWidth =MortarThickness/BMWidth;
double BorderHeight=MortarThickness/BMHeight;
for(WORD y=GetHeight(); y--;) {
double v=y/BMHeight;
int Row=Floor(v);
v-=Row;
double Randomness=Noise::NoiseFunction(Row)/14;
double Shift=(Row & 1 ? 0.5+Randomness : 0);
for(WORD x=GetWidth(); x--;) {
double u=x/BMWidth;
u=Frac(u+Shift);
double w=gFilters::HermiteStep(u, 0, BorderWidth +Randomness)
-gFilters::HermiteStep(u, 1-BorderWidth +Randomness, 1);
double h=gFilters::HermiteStep(v, 0, BorderHeight+Randomness)
-gFilters::HermiteStep(v, 1-BorderHeight+Randomness, 1);
BYTE B=BYTE(Round(255*w*h));
SetPixel(x,y, RGB(B,B,B));
} }
GreyScale=255;
}
It's a little more obvious now why HermiteStep was chosen: some of the lines are thicker:

Time to add some dirt using turbulence:
void Wall(const double& BrickWidth, const double& BrickHeight, const double& MortarThickness) {
double BMWidth =BrickWidth +MortarThickness;
double BMHeight=BrickHeight+MortarThickness;
double BorderWidth =MortarThickness/BMWidth;
double BorderHeight=MortarThickness/BMHeight;
for(WORD y=GetHeight(); y--;) {
double v=y/BMHeight;
int Row=Floor(v);
v-=Row;
double Randomness=Noise::NoiseFunction(Row)/14;
double Shift=(Row & 1 ? 0.5+Randomness : 0);
for(WORD x=GetWidth(); x--;) {
double u=x/BMWidth;
u=Frac(u+Shift);
double w=gFilters::HermiteStep(u, 0, BorderWidth +Randomness)
-gFilters::HermiteStep(u, 1-BorderWidth +Randomness, 1);
double h=gFilters::HermiteStep(v, 0, BorderHeight+Randomness)
-gFilters::HermiteStep(v, 1-BorderHeight+Randomness, 1);
u=0.1+w*h-Noise::Turbulence(x/10.0, y/10.0, 10,0.5);
BYTE B=BYTE(Round(255*u));
SetPixel(x,y, RGB(B,B,B));
} }
GreyScale=255;
}
The mortar is now distinctly black which will make coloring easier:
The black splattered areas have exceeded the [0,1] range, but that will be clipped in the next stage...
Time to add some color using a gColorSpline (added as a last parameter):
void Wall(const double& BrickWidth, const double& BrickHeight, const double& MortarThickness, const gColorSpline& Colors) {
double BMWidth =BrickWidth +MortarThickness;
double BMHeight=BrickHeight+MortarThickness;
double BorderWidth =MortarThickness/BMWidth;
double BorderHeight=MortarThickness/BMHeight;
for(WORD y=GetHeight(); y--;) {
double v=y/BMHeight;
int Row=Floor(v);
v-=Row;
double Randomness=Noise::NoiseFunction(Row)/14;
double Shift=(Row & 1 ? 0.5+Randomness : 0);
for(WORD x=GetWidth(); x--;) {
double u=x/BMWidth;
u=Frac(u+Shift);
double w=gFilters::HermiteStep(u, 0, BorderWidth +Randomness)
-gFilters::HermiteStep(u, 1-BorderWidth +Randomness, 1);
double h=gFilters::HermiteStep(v, 0, BorderHeight+Randomness)
-gFilters::HermiteStep(v, 1-BorderHeight+Randomness, 1);
u=0.1+w*h-Noise::Turbulence(x/10.0, y/10.0, 10,0.5);
SetPixel(x,y, Colors.Get(u).GetRGB());
} }
}
Now the effects all come together to give a realistic wall:
This is the color spline that was used for the image: 
  gColor BrownColors[]={gColor(0.8, 0.75, 0.6),gColor(0.5, 0.4, 0.3),gColor(0.4, 0.2, 0.1),gColor(0.2, 0.1, 0.0)};
  gColorSpline Browns(sizeof(BrownColors)/sizeof(gColor), BrownColors);
  Wall((100-2)/3.0, 8, 2, Browns);
The brick size values make the 100x100 pixel tile tilable: three bricks across and ten down:(100/(8+2)):
The lumpylumpy home page has a javascript demonstrator with sliders to control the wall's properties.
For more about textures, check out the Button tutorial.
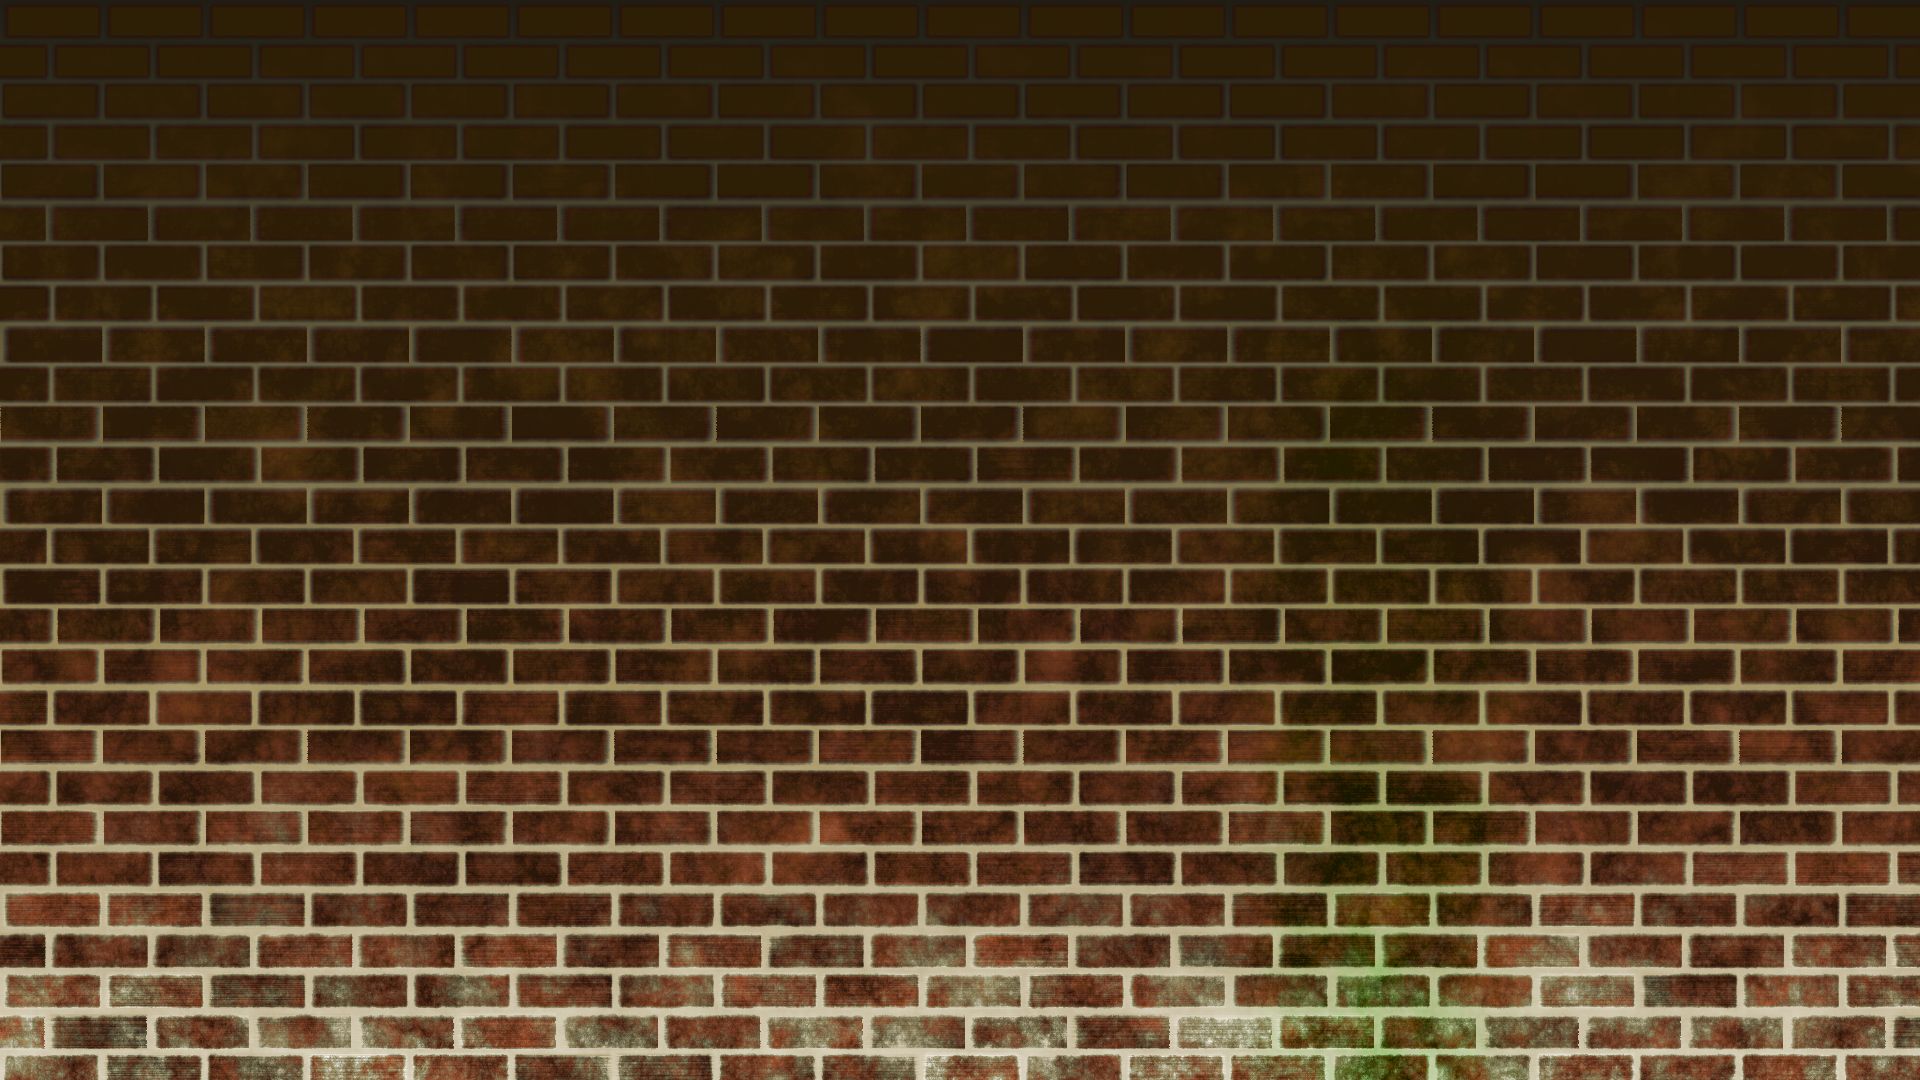
Here's a (1920x1080) Desktop Background created from the above code by adding effects like horizontal striping across the bricks, salt at the bottom of the wall, shading and dirt over the wall, and algae as if water has been dripping on it.
Get your operating system to stretch the picture to fill the desktop; it's a wall, so stretching it only alters the shape of the bricks, it'll still look good.
Click the image to see it full-size: